
MyLO - My Learning Online
Embedding Echo360 Recordings
Embedding Echo360 Videos into Content Windows
Embedding a video can be done anywhere MyLO provides a content window for posting items (e.g., Discussions, Content pages, etc.).
Note: You must be the owner of the recordings to use this function.
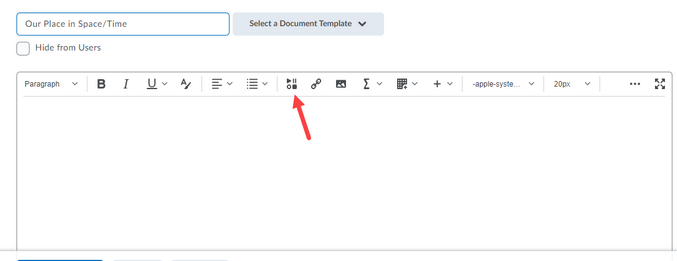
Lecturers and Students can select any video they own from their Content library. Once inserted, the video appears in the content window and users can play the video directly in the page.
To embed an Echo360 video into a content window
- Log in to MyLO.
- Open the Unit in MyLO where you want to post the video.
- Add a module or discussion post or other content item where you want to add the video.
- Click the Insert Stuff button, identified by the arrow in the above figure.
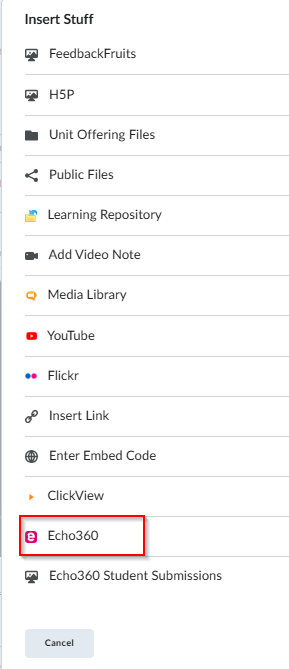
- If necessary, scroll through the Insert Stuff list to find the Echo360 plugin. It is clearly named Echo360.
- Click on Launch Media Picker under Choose existing Content
- Click on the video you want to embed. Click on next.
- Select a size for the frame to hold the embedded video - default is 640 x 420
- Select whether to Automute or Autoplay the video when users land on the page. These are optional. NOTE: Discussions is not used so this can remain on - students do not see this.
- Enter a Start at time if you want the video to begin playing somewhere other than at the beginning. Users can scrub through the entire video but this sets a static time for all users to begin watching.
- When finished, click Embed..
Note: For information on creating video assessments using this insert Echo360 feature please read this guide.
Using Browser Capture in Easy Embed
It is now possible to create and embed a recording 'on the fly' within your unit using the web browser based video recording application - Echo360 Browser Capture or Universal Capture - Personal.
To create, record and embed a video into a content window

- Log in to MyLO.
- Open the Unit in MyLO where you want to post the video.
- Add an announcement, module, discussion post or other content item where you want to add the video.
- Click the Insert Stuff button in the red boxes above.
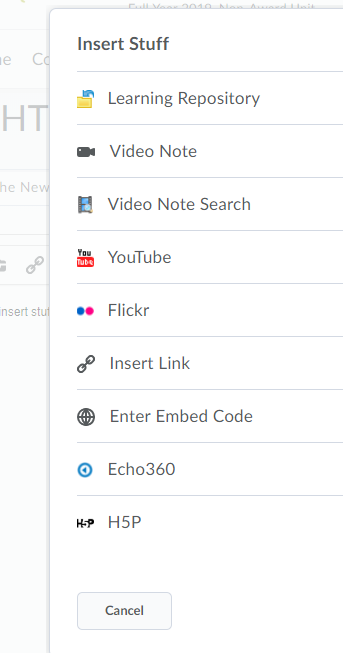
- If necessary, scroll through the Insert Stuff list to find the Echo360 plugin. It is clearly named Echo360. Click on this.
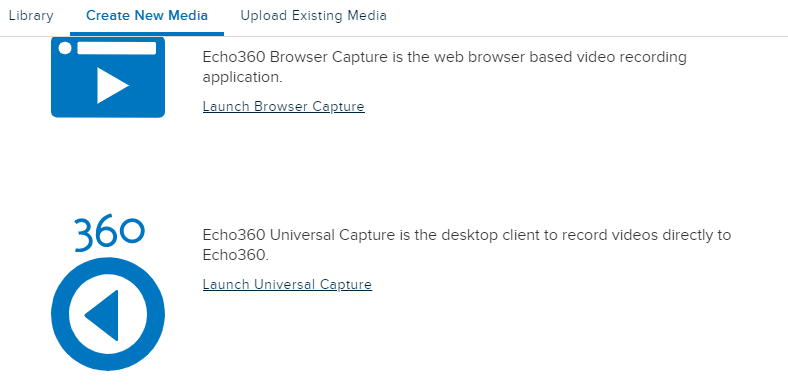
- Click on Create new Media
- Select Launch Browser Capture or Launch Universal Capture
- Launch Browser Capture will open in a new Browser
- Launch Universal Capture will open the desktop software
Once you have completed your recording and it says Complete you can close the tab.
- Click on Library
- Select the recording that you have just done
- Click Next and then Insert
Your recording will now be embedded into the content page in your unit.
Playlists from the Easy Embed workflow
Build, edit, share, and post video and audio playlists with your EchoVideo content. When embedding your playlist, set auto-play next and order enforcement options that prevent users from viewing the next video before they finish the previous one(s).
With this first release of playlists, be aware of the following:
- Playlists can only be seen, created, and used from within the Easy Embed tool in your LMS.
- Support within EchoVideo coming soon!
- Only audio and video content is supported.
- Interactive media, spherical videos, polls, and presentations coming soon!
- There are not yet analytics for the playlist as a whole, however, analytics are generated for the individual pieces of media that make up the playlist.
Creating a Playlist
- Log in to MyLO
- Locate the unit you wish to add playlist to
- Find the location where you want to create the playlist.
- Select to add one of the item types (Page, Assignment, Document, etc.).
- Give the item a Name that identifies either the video you are posting or the purpose for posting it (extra credit, ancillary research, look at my cute puppy, etc.).
- From the toolbar of the content window, click the Echo360 icon, as identified in above figure.
A dialog box appears. - Click Launch Media Picker to open a window with your recent content, listing the EchoVideo audio, video, or interactive media you own, any existing playlists, as well as media in any Collection where you have the Post permission. If you need to upload media to embed, click Upload Media or Upload Spherical Video (360°), and refer to the instructions in the link if necessary. You can select up to 50 pieces of media to include in your playlist.
- If necessary, use the Search text box and / or Filters options to find the media you want to embed into the window.
- Select the media you want to embed.
You may select up to 50 video / audio files. - Click Next.
The dialog box changes to the Playlist Options. - Enter a Playlist Name, Description (optional), and / or Tags (optional).
- Toggle on the Settings for your playlist.
- Enforce Order - prevent user from proceeding until they finish the preceding media.
- Autoplay Next - the next piece of media in your playlist automatically plays when the previous piece finishes playing.
- Click Next.
The dialog box changes to the Playlist Content. - Use the vertical grip dots on the left to drag and drop your media to rearrange the order. Use the vertical ellipsis on the right to delete the media from the playlist.
- Click Next.
The dialog box changes to the Embed Options. - From the Player Size drop-down list, select the size for the media playback. It is 640 x 420 by default.
- From the Player Style drop-down list, select the style you want to be applied to the player.
The Player Style drop-down only appears if your institution has created custom player styles to choose from. If you have selection options, pick the one for your department or organization (or the default) that you want applied to the playback of this media.
Selecting a style may automatically select Size, Autoplay, and Automute options for you; these can still be changed. - If appropriate, enable the option to Autoplay the video (it will play as soon as a user opens the page you are embedding it into).
- If you enable Autoplay, Automute is automatically enabled, to accommodate browsers that no longer allow autoplay with sound. You CAN enable Automute separately without Autoplay.
- If appropriate, set a Start At time. If set, the video will begin playing at that timestamp, although viewers will be able to rewind/fast-forward the player to view any segment of the embedded video.
- When finished, click Embed.
- Complete whatever remaining fields are on the item you are adding, then click Save or Save & Publish as appropriate.
Once the item is published, users can access the item and view the embedded video.
To view the list as shown below, select Expand on the embedded video and then select the playlist toggle
If you selected Autoplay or Start At configurations for the video, those are enacted for the viewer.
Generating Links and Embed Code for Media
From the Library
To generate a link from your Library
- Use the Filters and / or Search box to find the item you want to create a link for.
- Hover over the media tile and click the Menu button.
- Select Share from the media options menu, as shown in the below figure.
Links
From the Media Details Page
To generate a link from the media details page
- Click on a media tile in your Library to open the Media Details page.
- Click to navigate to the Publishing tab.
- Click Create Link, as identified in the below figure.
The link is immediately generated and displayed in a table with default settings.links
Echo360 Lockdown Student Submissions
D2L and Echo360 now support the lockdown of student-created media used within an assignment submission so they cannot edit or delete the content after submission. Students will still embed as they currently do although there is now a separate embed option for student submissions.
- From the MyLO homepage select the unit required.
- Click on Assessments > Assignments
- Select the relevant assignment
- To Embed your video assignment, click on Insert stuff
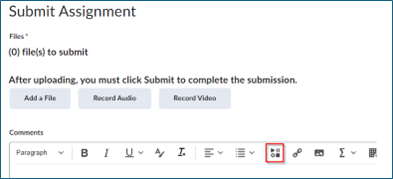
- Click on the newly created Echo360 Student Submissions (you may need to scroll to see this) here you have the option of Choosing existing content or uploading content.
- Once you have added the media Click Submit
- Submission is now complete.
Media editing capability is unavailable for the embedded media by clicking on My Echo360 library and click on the media that you just embedded or the […] menu icon for the media. (student will see the below in Echo360)
Notice that the Edit Media and Delete/Trash options are disabled/greyed out for the selected media as shown in the views below.
